Getting Started with Glow: Read Markdown in Your Terminal
Most projects keep their most useful knowledge in Markdown: the README, the changelog, a docs/ folder. Most of us read those files either raw in a terminal, all ## and |---|, or by switching to a browser.
@oakoliver/glow renders Markdown right in the terminal: headings, tables, code with syntax highlighting, task lists. It's a TypeScript port of Charm's Glow. This guide covers the CLI from first install to two small workflow tricks.
glow FILE renders a document; glow DIR opens a browser where you can search, read and scroll every Markdown file in it.

Every command below was run as written, against a small made-up project called pixel-bot, and every picture is a recording of that run. How the port itself was built is covered in Porting Go's Glow to TypeScript.
I – Install
npm install -g @oakoliver/glow
That puts a glow command on your PATH. It runs on Node, and its rendering comes from @oakoliver/glamour, which in turn pulls in highlight.js for code blocks and node-emoji for :emoji: shortcodes.
If you'd rather not install anything globally, add it to a project instead (npm install @oakoliver/glow); section VI shows how to use it from there.
II – Render a File
glow README.md
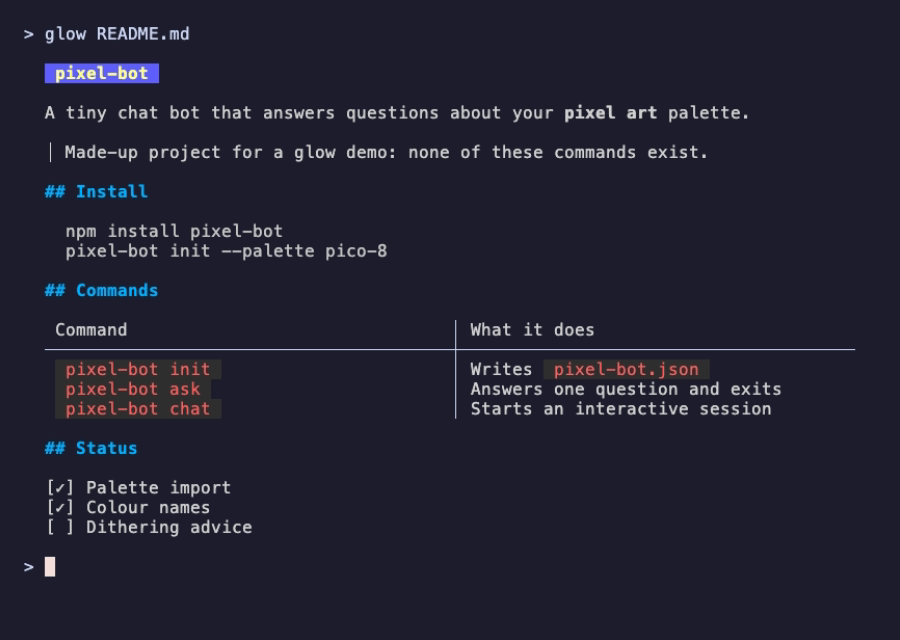
Everything you'd expect from a Markdown viewer is there: the table gets real columns, code spans are highlighted, the blockquote gets a bar, and - [x] becomes a checkbox. The output is plain text with colour codes, so you can scroll back through it like any other command output.
Glow also reads from places other than local files:
glow https://raw.githubusercontent.com/charmbracelet/glow/master/README.md
glow github://charmbracelet/glow
The second form finds a repository's README for you; gitlab://owner/repo works the same way.
III – Read From stdin
Pass - as the file and glow renders whatever is piped into it:
cat CHANGELOG.md | glow -
echo 'Deploy **done** in `42s`' | glow -
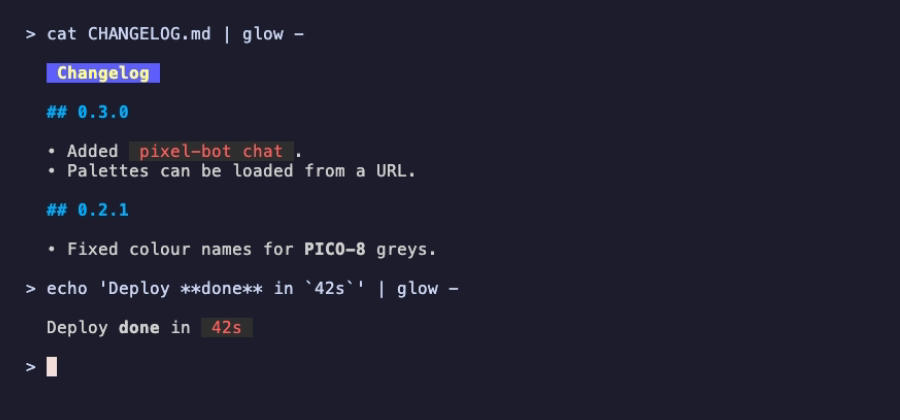
That makes glow a finishing step for anything that produces Markdown: release notes from a script, a generated report, an LLM's answer.
There's one behaviour to know about, and it comes straight from the original Glow. Whenever glow's stdin is not a terminal, glow reads stdin, even if you also give it a file name. In an interactive shell that never matters. In a script, a cron job, a CI step or some git hooks, stdin may be an open pipe, and then glow README.md waits for input that never comes. The fix is to give it an empty stdin:
glow README.md < /dev/null
The git hook in section VI does exactly that.
IV – Browse a Folder
Point glow at a directory (or run it with no arguments for the current one) and it opens a full-screen browser instead of printing:
glow docs
The animation at the top of this article is that command. The keys you'll use most:
| Key | Does |
|---|---|
↑ ↓ / j k |
Move through the list, or scroll a document |
/ |
Filter the list by name |
Enter |
Open the selected document |
d / u, f / b |
Half page or full page down / up |
g / G |
Top / bottom of the document |
Esc |
Back to the list |
e |
Open the document in $EDITOR |
c |
Copy the document to the clipboard |
? |
Show every key |
q |
Quit |
To open a single file in the reader instead of printing it, use glow -t README.md; add -l for line numbers.
V – Styles and Width
Two flags control most of how the output looks. -s picks a style and -w sets the wrap width:
glow -s dracula -w 60 docs/getting-started.md
glow -s pink -w 60 docs/getting-started.md
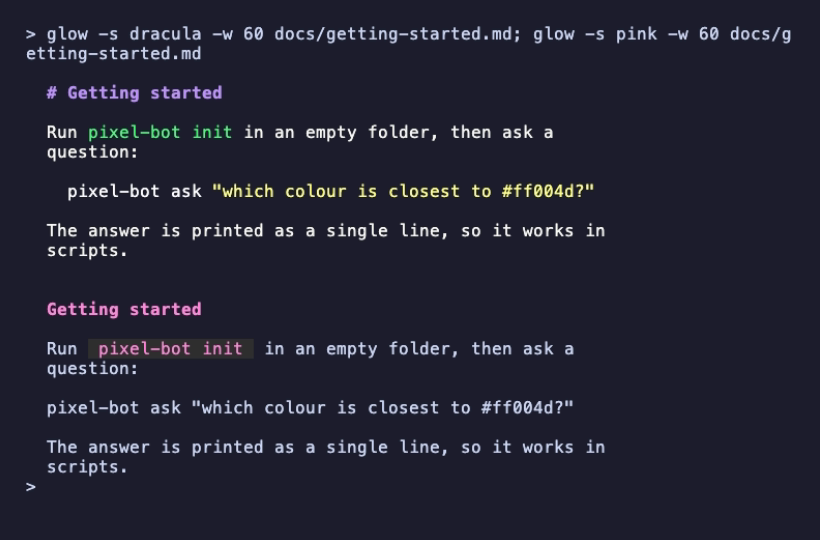
The built-in styles are auto (the default), dark, light, pink, dracula, tokyo-night and notty. notty has no colours, and glow switches to it automatically when its output isn't a terminal, so glow README.md > out.txt writes plain, uncoloured text. You can also pass the path of a JSON style file to -s.
To make a choice permanent, run:
glow config
It opens glow's config file in $EDITOR, creating it first with the default for every option and a comment explaining each one. On macOS the file lives at ~/Library/Preferences/glow/glow.yml. Two lines are enough to change the defaults:
style: "dracula"
width: 80
VI – Glow in Your Workflow
Show the changelog after every pull
Git runs .git/hooks/post-merge after every merge, including the one inside git pull. This hook checks whether the merge changed CHANGELOG.md, and if it did, renders it:
#!/bin/sh
# .git/hooks/post-merge: show the changelog when a merge or pull changed it.
if git diff --name-only ORIG_HEAD HEAD | grep -qx CHANGELOG.md; then
  glow -w 70 CHANGELOG.md < /dev/null
fi
Save it as .git/hooks/post-merge, make it executable with chmod +x, and the next pull that brings a release note shows it:
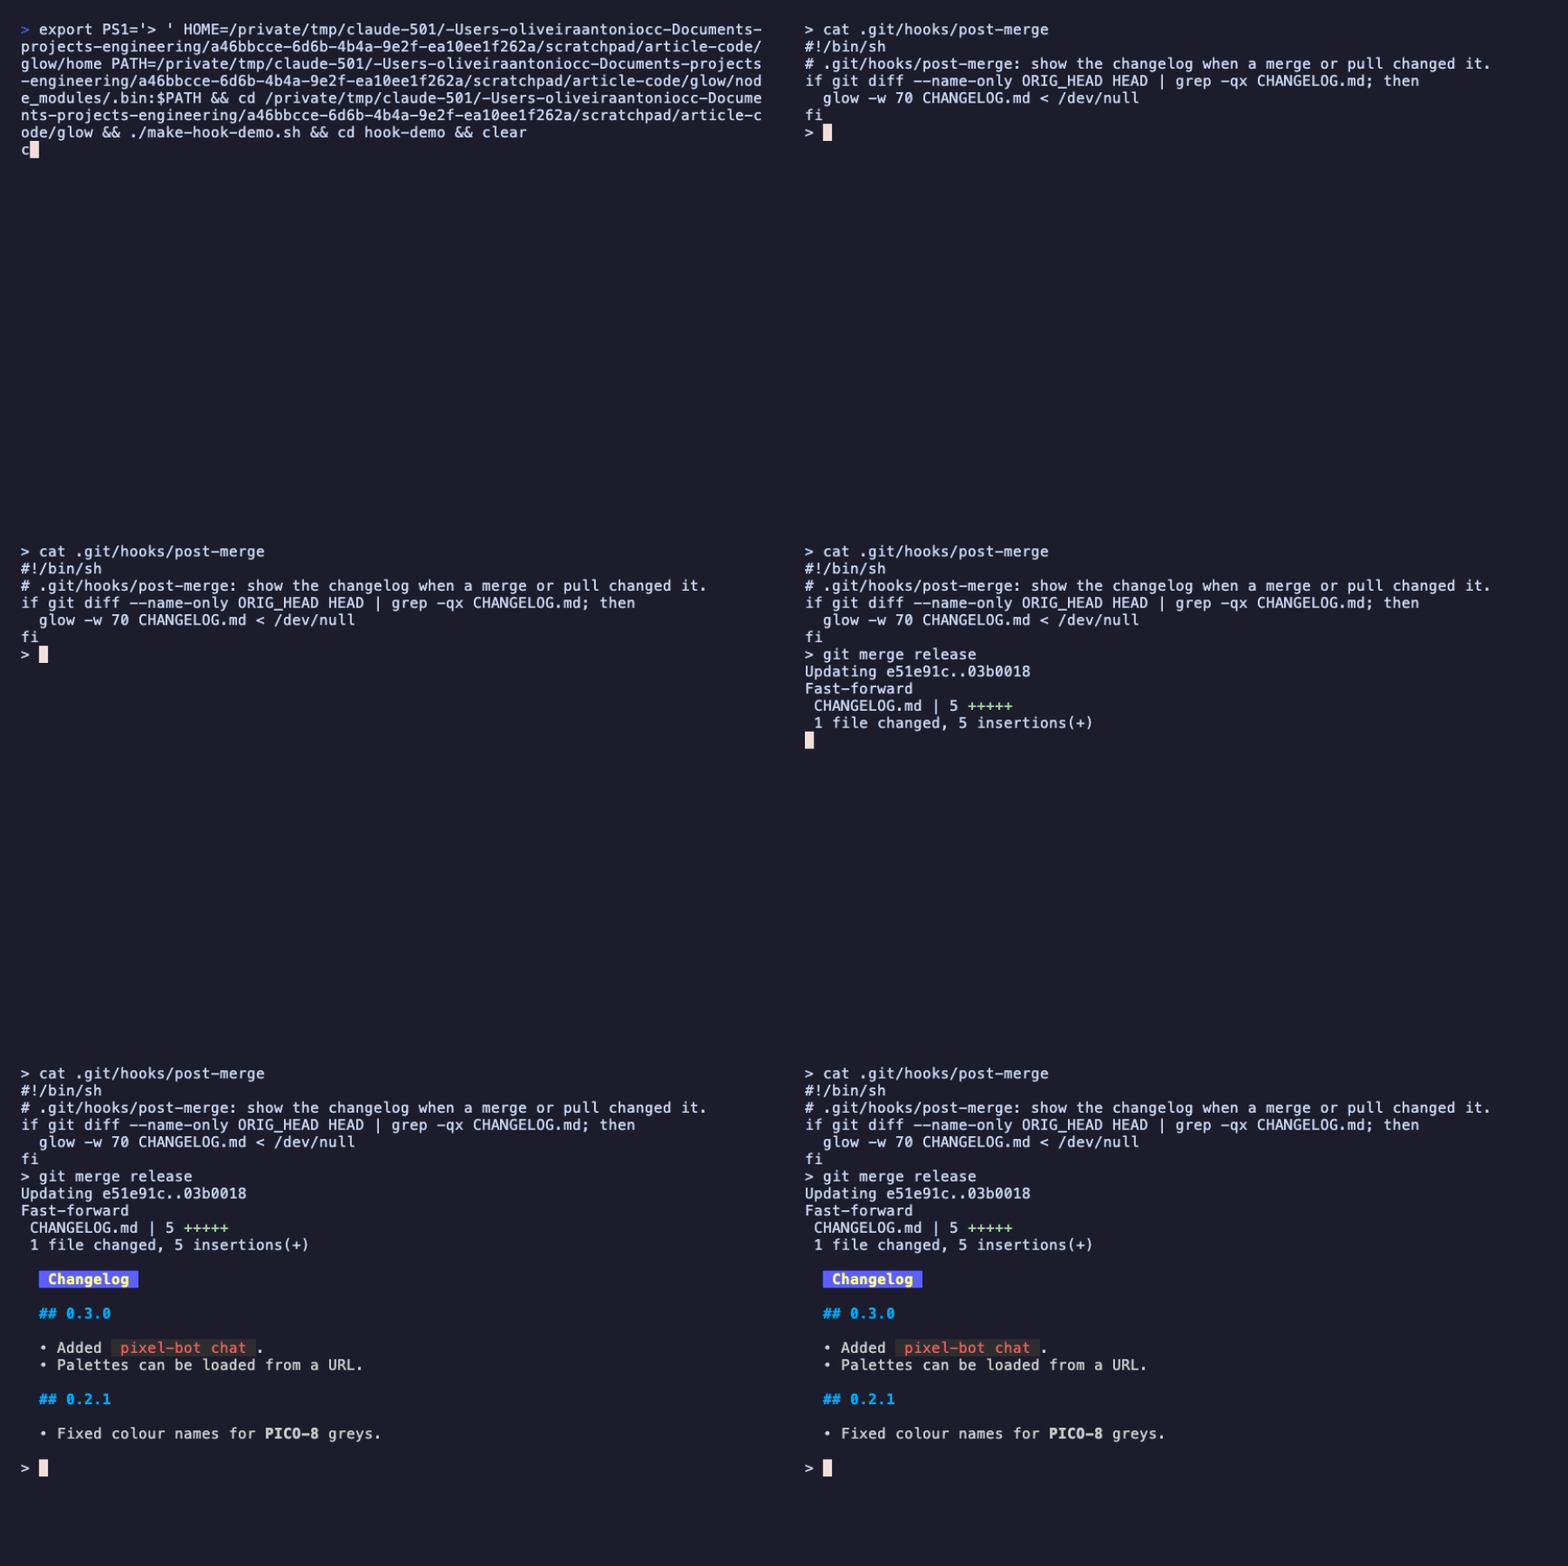
ORIG_HEAD is where your branch was before the merge, so the git diff lists exactly the files the merge brought in. The < /dev/null is the stdin precaution from section III.
Give your project a docs command
If glow is a dependency of your project rather than a global install, npm scripts can still call it, because npm run puts node_modules/.bin on the PATH:
npm install @oakoliver/glow
npm pkg set scripts.docs="glow docs"
npm run docs
Anyone who clones the repository now gets the docs browser with one command, without installing anything globally.
From TypeScript
glow also exports the pieces of its TUI. For example, this opens the same browser from your own program:
// open-docs.ts
import { NewProgram, defaultConfig } from '@oakoliver/glow';

const cfg = defaultConfig();
cfg.path = './docs';

await NewProgram(cfg).run();
I ran it with both node open-docs.ts and bun open-docs.ts. If what you want is the rendering rather than the browser, Markdown in and styled text out inside your own code, use @oakoliver/glamour directly: it's the library glow uses to draw every page above.
VII – What to Read Next
- Line numbers and long files.
glow -t -lopens a file in the reader with line numbers, which is the most comfortable way to read a long design doc in a terminal. - Hidden folders. By default the browser skips hidden and ignored files;
-ashows everything. - Your own style. Download one of the JSON styles from upstream Glamour's
styles/folder, change the colours or prefixes, and pass the file to-s. - The rest of the toolkit. glow is built from @oakoliver/bubbletea, @oakoliver/bubbles, @oakoliver/lipgloss and glamour. Each one is usable on its own if you want to build a terminal app of your own.
Requirements
- Runtime. The
glowcommand runs on Node; everything here was run on Node 26.8. The library import in section VI also ran on Bun 1.4. The package ships ES module and CommonJS builds with type declarations. - Terminal. Any terminal with ANSI colour. The browser and reader need an interactive terminal; for scripts, print with
glow FILEand remember< /dev/null. - Source. github.com/oakoliver/glow, MIT licensed, based on charmbracelet/glow.